Summary
I use the following for my sailing video capture and edit:
- GoPro Hero 9 with Max Lens Mod
- 1080p/60fps resolution with horizon locking
- Hand-made stern side camera mount
- Telemetry Overlay app on Mac if I would like to add telemetry
- iMovie app on Mac if I would like to do some video editing
More details are described in the next sections.
Introduction
Having GoPro type on-board action camera while sailing is useful to check your sailing posture, body movement and boat handling. You can review the selfie video by yourself or you may ask your coach to review it to get feedback. While I have seen people attach the camera on the bow side deck or boom, attaching it on the stern side seems to work best to capture the body movement together with the water condition. The example video is: https://youtu.be/0W2oZ9NzT-M
In this article, I would like to explain my camera, camera mount setup and additional app that can display the GPS etc. telemetry data from the camera.
 |
| Photo 1. Screen shot of selfie video |
Camera
I used to use a cheaper alternative of GoPro action camera: AKASO V50, which was only $100 in 2018. I found it provide pretty impressive image quality and image stabilization for its price. I enjoyed using it for 3.5 years.
However, I upgraded the camera in the late 2021 with GoPro Hero 9, primarily because of its horizon leveling/locking capability. It is more than 3x expensive than cheaper alternative but I found it is worth the price. Without horizon leveling/locking function, the image is fixed with the boat, so when the boat tilts, it is the background that tilts. (Human brain auto-adjusts the image to perceive, so it does not look too unnatural, but it is still not too natural.) With this horizon function, the background is fixed and the boat tilts. You can see the difference in the following video clip:
Since horizon leveling/locking has to crop out the image from the larger image, I found it is good to add "Max Lens Mod" (additional $90) to get the wider view after the horizon leveling/locking.
Another very nice feature of recent GoPro is it can record the GPS etc. data with the video, which can be displayed by GoPro's Quik app or third party app such as Telemetry Overlay. This is useful to analyze the boat route, tacking angle, speed, acceleration, heel angle etc. This is touched upon later section.
 |
| Photo 2. GoPro Hero 9 with Max Lens Mod |
I found video resolution of 1080p/60fps is very good for on-board camera use case. GoPro can allow higher resolution and/or frame rate depending on the view setting, but higher resolution/frame rate increases the file size and 1080p/60fps is more than enough to review the selfie video.
Camera mount
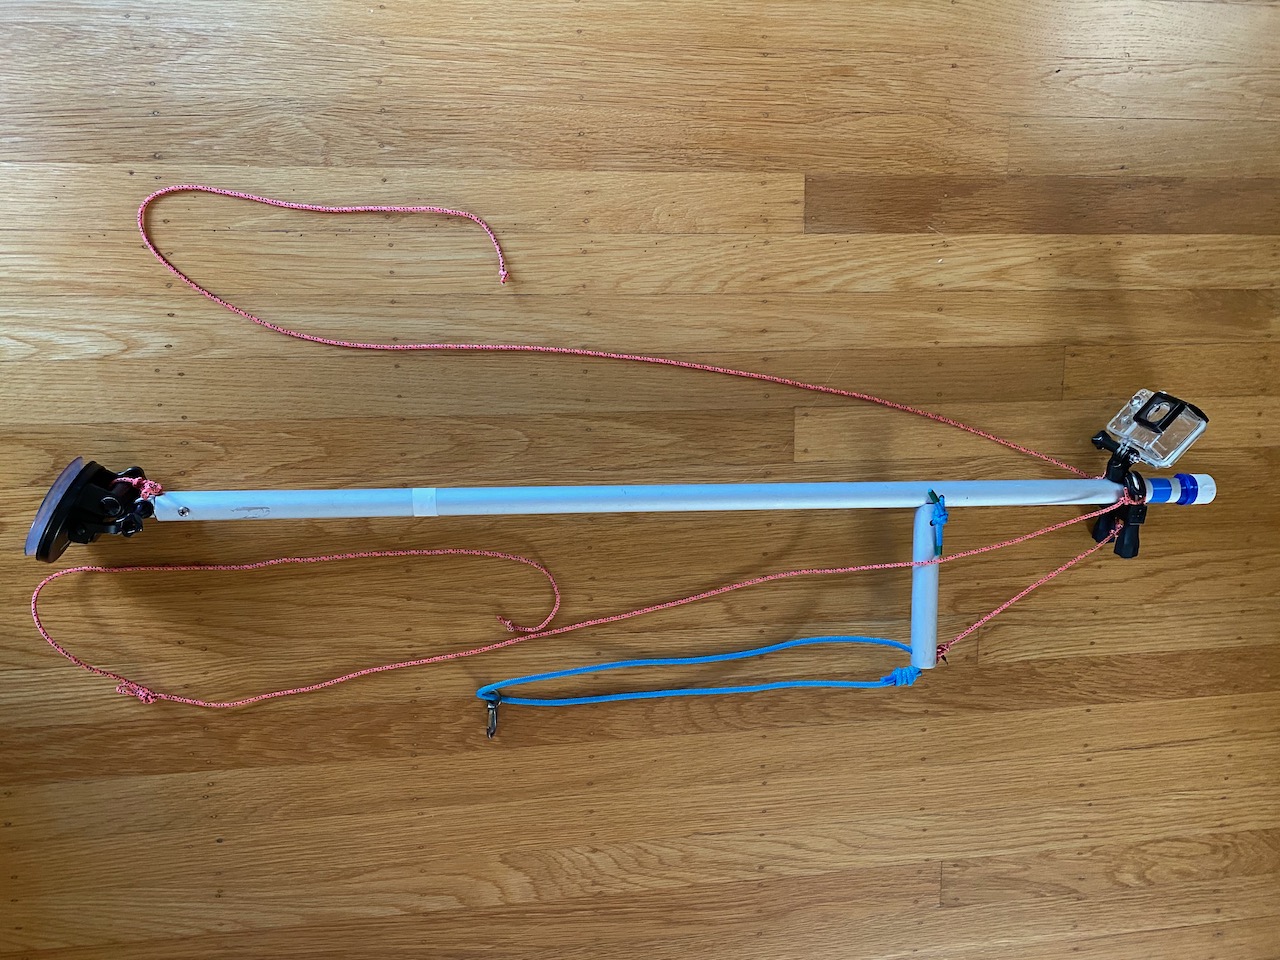
I hand-made my stern side camera mount. The materials used are:
- (1) Aluminum pole: One long pole ~37 inch for the main pole to mount the camera (I attached my camera at 34 inch from the end), one short pole ~6 inch for tie-down arm. I used a broomstick whose diameter is 1 inch, and this was enough for these two.
- (2) Suction cup: I originally used cheaper alternatives found in Amazon, but they were less stable and broken after several use. So, I now use Genuine GoPro suction cup, which is not cheap ($40), but more stable and sturdy. Again, it seems worth the money.
- (3) GoPro pole mount: I have been using: Pole mount in Amazon
- (4) Strings, shock codes and a hook clip: to harness the pole to the boat
- (5) Some materials to craft the pole joint
How to built the mount system will be mostly self-explanatory from the pictures. The only part which I needed some crafting was (5), as I could not find off-the-shelf joint that can be attached to the pole end. (Photo 6 - 7) The way I made was to use two aluminum plates for the fingers and one plate in between as a spacer. I sanded the plates to make them appropriate thickness. Then, moulded them in epoxy resin, plunged into the pole and bolted it. I would think there will be simpler way; for example, m friend told me he wrapped the off-the-shelf GroPro joint with O-rings (to adjust the diameter so that it tight fit inside the aluminum pole) and pushed it into the aluminum pole, which he said works fine for him.
I attached shorter pole to the main pole in shock code so that it can be folded to be easy to carry. This short pole (or arm) acts like a spreader for the mast to create downward force in effective angle. I use shock code from this pole to tie it down to the drain plug. Small string loop to hook the shock code was attached to the drain plug. Without this downward force, the pole bounces too much in wavy conditions.
Mounting this camera system to the boat is fairly easy: Attach the sanction cup a little right side of the stern from the center (enough clearance for the rudder), tie the right and left side strings to the traveler eyes, and hook the shock code to the drain plug. Adjust the right string and left string so that they have balanced tension.
 |
| Photo 3. Camera mount system |
 |
| Photo 4. Camera mount system |
 |
| Photo 5. Camera mount system |
 |
| Photo 6. Pole joint (hand crafted) |
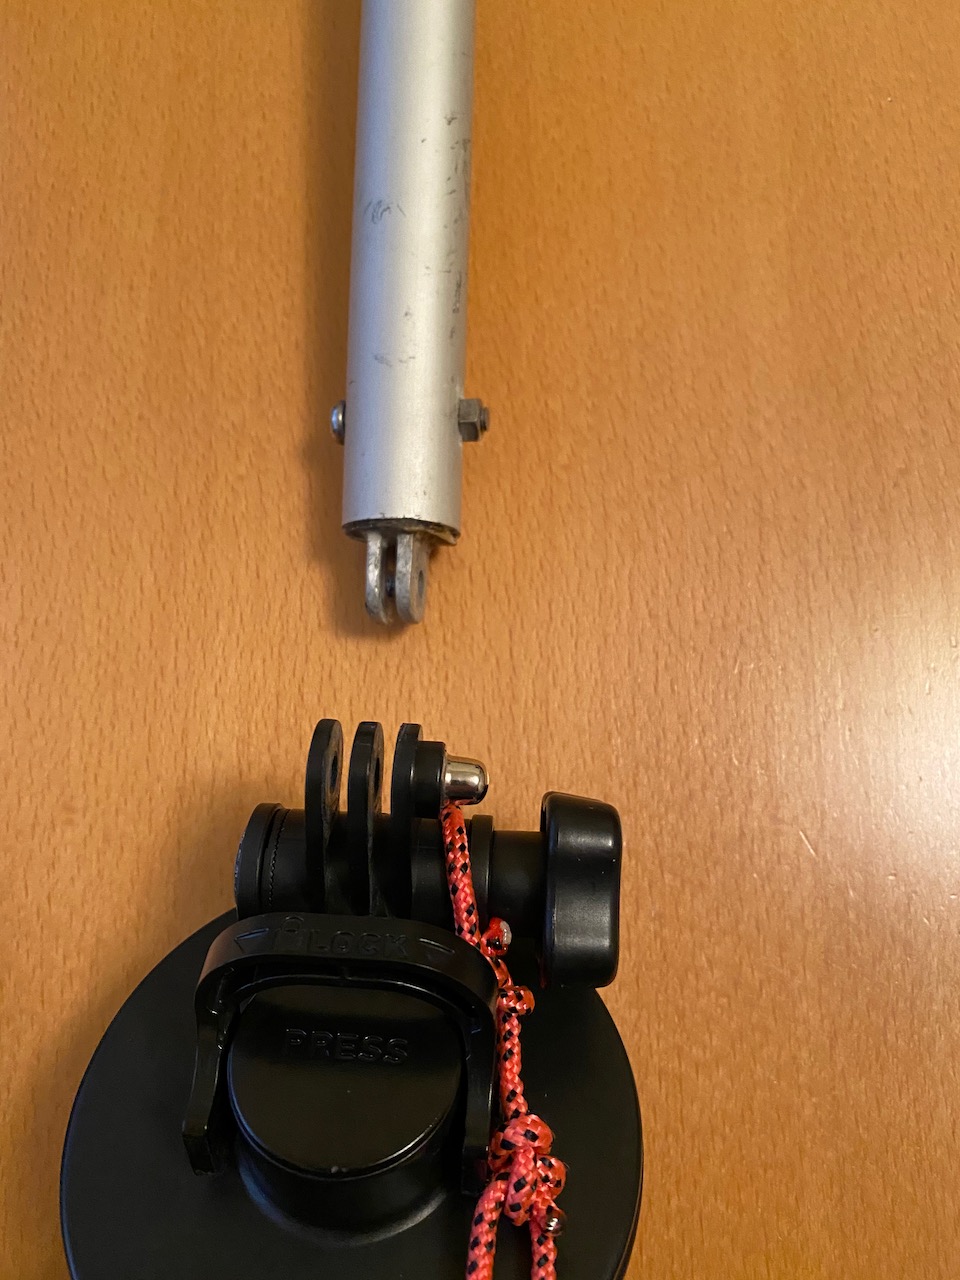 |
| Photo 7. Aluminum pole bottom and suction cup |
 |
| Photo 8. Camera mount system |
Displaying telemetry data
The last section is about displaying the telemetry data such as the route of the practice session, speed, heel angle etc. By turning on the GPS function, GoPro can record the GPS etc. source data. GoPro provide free app called "Quik" to display the GPS data, but I did not like it too much, because it is only available for iPhone/iPad (I guess Android too) but not available for Mac (or Windows) and the data visualization options that can be displayed is limited.
I found "Telemetry Overlay" app (https://goprotelemetryextractor.com), which is available for Mac (or Windows, Linux), offers versatile data visualization capabilities and options, and like it. You have to pay for this app, but again, I think the app is worth the money.
 |
| Photo 9. Telemetry Overlay app |
 |
| Photo 10. Telemetry gauges I use |